Category Archives: dessert

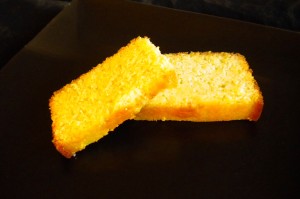
Lemon Pound Cake

Springtime.  Sun, longer days, dreams of Summer bliss.  All such happy, happy  thoughts.

See, the gods and goddesses got the lemon season totally right.  Sunny yellow?  Check.  Tart but ready for a bit of sweet sugar?  Check.  A perfect transition between seasons.

Yet, the gods and goddesses did manage to get a few things wrong.  Limes and avocados ripe in the winter to spring months, but the tomatoes for guac in August.  What in the world does that do to margarita season? Another gripe is the whole root vegetable thing in October.  Here along the Pacific coast, October is sunny and warm and inviting and begs for leisurely walks to soak in the sun’s rays.  Do root vegetables go with this vibe?  I think not.

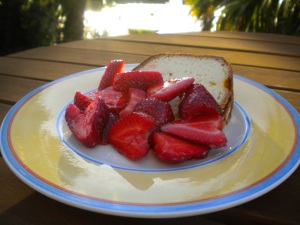
For now, let’s get back to Springtime, and lemons, and strawberries and make a lemon pound cake and smother a thick slice with strawberries fresh from the field.  We can all get on board with that plan.

Lemon Pound Cake

recipe inspired by Cooking Light , strawberries from Chan’s strawberry stand

Ingredients:

For the cake

  • Cooking spray
  • 3 TBS dry breadcrumbs
  • 3 1/4 cups all-purpose flour
  • 1/2 tsp baking soda
  • 1/4 tsp salt
  • 3/4 cup butter or stick margarine, softened
  • 2 1/2 cups sugar
  • 3 large eggs
  • 1 1/2 TBS grated lemon rind
  • 1/4 cup fresh lemon juice, divided
  • 8 oz low-fat sour cream
  • 1 cup powdered sugar

For the topping:

  • 2 baskets fresh strawberries, cleaned and sliced into thirds
  • 1 TBS sugar

Directions:

  1. Preheat oven to 350°.
  2. Coat a 10-inch tube pan with cooking spray, and dust with the breadcrumbs.
  3. Lightly spoon flour into dry measuring cups; level with a knife. Combine flour, baking soda, and salt in a bowl; stir well with a whisk. Beat the butter in a large bowl at medium speed of a mixer until light and fluffy. Gradually add the granulated sugar and lemon extract, beating until well-blended. Add eggs, 1 at a time, beating well after each addition. Add grated lemon rind and 2 tablespoons lemon juice; beat 30 seconds. Add flour mixture to sugar mixture alternately with sour cream, beating at low speed, beginning and ending with flour mixture.
  4. Spoon batter into prepared pan. Bake at 350° for 1 hour and 10 minutes or until a wooden pick inserted in center comes out clean. Cool in pan 10 minutes on a wire rack; remove from pan. Cool completely on wire rack. Combine 2 tablespoons of lemon juice and powdered sugar. Drizzle glaze over top of cake.
  5. Prepare strawberries by combining strawberries and sugar in a bowl and allowing to sit for at least 30 minutes.
  6. Slice lemon pound cake and top with strawberries.

Notes:

  1. Simply delicious!
  2. This is a perfect dessert for a meal you are hosting because the cake can be made a day before.
  3. Sneaking a thin slice of the pound cake for breakfast is totally acceptable.

Lemon Bars

Spring has sprung, and although on one hand this is expected, so many things are new as if for the first time.  California poppies line the highways and byways of daily travel.  Sunlight in the evenings invigorates.  The sun seems to be everywhere … in the sky, in the mood, and in the food.

Lemon Bars

inspired by the amazing Ina Garten

Ingredients:

  • 1/2 pound unsalted butter, at room temperature
  • 1/2 cup granulated sugar
  • 2 cups flour
  • 1/8 tsp salt
  • 6 extra-large eggs at room temperature
    3 cups sugar
  • 2 TBS grated lemon zest
  • 1 cup lemon juice, freshly squeezed
  • 1 cup flour
  • Confectioners’ sugar, for dusting

Directions:

1.  Preheat the oven to 350 degrees F.

2.  For the crust, cream the butter and sugar until light in the bowl of an electric mixer fitted with the paddle attachment. Combine the flour and salt and, with the mixer on low, add to the butter until just mixed. Dump the dough onto a well-floured board and gather into a ball. Flatten the dough with floured hands and press it into a 9 by 13 by 2-inch baking sheet, building up a 1/2-inch edge on all sides. Try not to eat too much of the “extra bits” as you do this.  Chill.

2.  Bake the crust for 15 to 20 minutes, until very lightly browned. Let cool on a wire rack. Leave the oven on.

3.  For the filling, whisk together the eggs, sugar, lemon zest, lemon juice, and flour. Pour over the crust and bake for 30 to 35 minutes, until the filling is set. Let cool to room temperature.

4.  Cut into bite sized pieces and dust with confectioners’ sugar.

Notes:

  • My favorite grocery store has the most wonderful lemons in stock.  They are the size of limes and just full of juice.  These were certainly what got me onto the lemon bar kick.
  • Lemon bars make great thank you gifts for people who have jumped in to lend a hand.  😉
  • I love this plate.

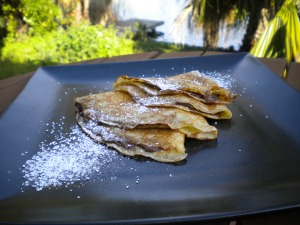
Nutella Crepes

Let’s try a bit of logic today to figure out why it took so many darned years to make these delectable treats.  We will have two individual logical equations followed by one that connects the two.

  • LivinLocal does not like hazelnut flavored coffee beans.
  • LivinLocal does not line hazelnut flavored coffee additives, hence
  • LivinLocal does not like hazelnuts.
  • Nutella contains hazelnuts, hence
  • LivinLocal does not like Nutella.

Secondly,

  • LivinLocal usually manages to get food to stick to her expensive nonstick pans.
  • LivinLocal never has sticking problems with her cast iron skillet pans.
  • LivinLocal wants to make crepes.
  • Making crepes requires ninja crepe flipping skills
  • LivinLocal has no such ninja crepe flipping skills, hence
  • LivinLocal cannot make crepes because they require a nonstick pan and she is unable to use one properly, and crepes require ninja crepe flipping skills that are not currently evident.

In conclusion,

  • LivinLocal will not be able to make crepes nor would she like any Nutella filling

In short, wrong!   So, in avoidance of the clear lapses in logic above, we move quickly to the recipe.

Nutella Crepes

Crepes inspired by Paula Deen, Nutella inspired by my daughter

Ingredients:

  • 3 eggs
  • 1 1/3 cups low fat milk
  • 3/4 cups flour
  • 4 TBS butter, melted, plus a tad more for the pan
  • pinch of salt

Directions:

  1. In a medium mixing bowl, whisk eggs until light and frothy.  Vigorously whisk in remaining ingredients until incorporated, allowing for some small lumps to remain.   Set aside for 20 minutes.
  2. Heat a nonstick saute pan over medium heat.  Add a touch of butter, swirling to coat the bottom of the pan.  Add just enough batter (a scant 1/4 cup) to coat the bottom of the pan when swirled around.  Allow to set until the edges bubble lightly.  Gently flip the crepe and cook for 30 seconds on the other side.  Transfer to a plate. Continue making crepes until the batter runs out.
  3. Place one crepe on a plate, schmear Nutella on half of the crepe.  Fold in quarters.  Repeat.  Dust with powdered sugar.

Notes:

  • Yes, the serious whisking burns enough calories for you to have a second crepe.
  • The recipe called for 1/4 cup of batter in the pan, but that was too much.  When I got the technique down, I found that just over half of that was needed.
  • These crepes include enough butter in the batter to keep them from sticking.  Even with my pans.
  • People told me that after tossing the first crepe, the rest would be easy.  Let it be known that I tossed crepes 1, 3, 4, and 7 before getting the hang of it.
  • Crepes will become a regular part of my repertoire as they are really quite fun to make!

Peach and Blackberry Crisp

When the Brentwood farmers’ market opened for the season, I griped endlessly about the number of farmers from out of the area selling their wares.  We had 3 healthy strawberry stands open just a stone’s throw from the market, but only strawberries from a good hundred miles away were available.  What’s up with that?  Finally, many local producers are represented at the market. This can be rough on the small farmers as they need to be running a stand at the farmers’ market as well as their own farm stand in town.  For so many family farms, this is quite an undertaking.

Moffat Ranch peaches.  I’d seen the sign for their peaches on the road between Farmer’s Daughter and Chan’s Berries, but never took the detour.  Luckily I met them at the farmers’ market.  These are the nicest people you ever have met, and their peaches are truly divine.  The peaches that weren’t just sliced and slurped up at home made it into this delicious crisp.

Peach and Blackberry Crisp

Ingredients:

For the filling:

5 large ripe peaches, pitted and cut into chunks

1 basket blackberries, rinsed
1 lemon, zested and juiced
3 TBS all-purpose flour
1/4 cup tightly packed brown sugar
2 TBS sugar
1 tsp vanilla extract
Pinch kosher salt

For the topping:

1 1/4 cups all-purpose flour
1/2 cup rolled oats
1/2 cup brown sugar
1/2 cup sugar
1 1/4 stick cold unsalted butter, cut into pea sized pieces
1/2 cup almonds, roughly chopped
Pinch kosher salt
1 to 2 TBS cold water

Directions:

1.  Preheat the oven to 350 degrees F.

2.  For the filling, toss the peaches in a large bowl with the zest and lemon juice. Add the rest of the ingredients and stir to combine. Pour into a 10 by 13 casserole dish.

3.  For the topping, combine all of the ingredients in a food processor except the water. Pulse until combined, this will take about 30 seconds. Add water, 1 tablespoon at a time until mixture is clumpy but crumbly.  Sprinkle over the peach mixture, crumbling the topping so it doesn’t clump.

4.  Bake for 60 minutes, or until the filling is hot and bubbly and the topping, brown and crispy.

Notes:

  • This was a breeze to put together!

Cherry Pie

Sometimes the smallest choices in word selection can make the largest difference in mind set.  “I don’t <insert verb here>” sounds so similar to “I will <insert verb here>” but is miles apart in mind set.

This year, the local cherries are ripe and ready for the picking a full week before the Memorial Day invasion of U-Pick crowds.  Deciding to take advantage of the situation, I tried to figure out what to cook with the cherries left after snacking on them endlessly all day.  Duck with a cherry sauce reduction?  Duck isn’t available in the local stores.  Cherry ice-cream?  Its crazy cold for some reason this week, so that doesn’t sound desirable (yet).  Cherry pie?  I don’t bake pies.

There you go.  “I don’t bake pies.”  But, the cherries are plentiful and I don’t have to fight crowds to get them.  What’s the worse thing that can happen?  I end up with ugly pastry crust and lovely, gooey cherries?  Life can be worse.  After a quick 180 in mindset, I decided that I DO bake pies as long as Marie Callender provides the crust.  I did, and so can you.

Cherry Pie

adapted from this Food Network Magazine recipe

Ingredients:

2 frozen pie crusts

6 cups pitted, halved Bing cherries

2 TBS quick-cooking tapioca

3/4 cup sugar

1/4 tsp salt

1/2 tsp vanilla extract

2 TBS water

1 TBS heavy cream

1 tsp sugar

Directions:

1.  Combine cherries tapioca, sugar, salt, vanilla, and water in a bowl, stirring gently to coat the cherries evenly.

2.  Pour berry mixture into one pie shell.  Lightly flour a work surface, invert the empty pie shell onto the surface, dust with flour, and roll out with a rolling pin to increase the diameter by 2 inches.  Gently place this dough over the pie filling.  Press the crust edges together and trim the excess.

3.  Place a foil-lined baking sheet on a rack in the lower third of the oven; preheat to 450 degrees.  Wrap an oiled, wide band of foil around the pie edge to protect the crust.  Make slashes in the top of the crust; chill for 30 minutes.

4.  Reduce the oven to 400 degrees.  Bake the pie for 30 minutes.  Remove the foil band, brush the crust with heavy cream and sprinkle with sugar.  Bake until golden brown, about 30 minutes. Cool before slicing.

Notes:

  • Confessional time.  While I did actually pick cherries once, I now buy them at the orchards already picked.  Now I simply relish the sheer joy in picking cherries that has kept me from repeating the event.
  • After brushing the crust with cream, the pie was ready in 25 minutes.
  • This is not your “Hey, Aunt Betty, my cherry pie is going to beat yours at the county fair” kind of pie.  Its more of a “Check this out, I can make a delicious cherry pie that 1) doesn’t use canned fruit, and 2) isn’t sickening sweet.”
  • Proud?  Heck yeah I’m proud!

Lemon Lemon Loaf

One of the most enjoyable, stressful, and pretty much makes my day kind of days are when I’m making dinner for the Kaleidoscope Krockpot Brigade.  Kaleidoscope is a local cancer support group and the krockpot brigade is simply one of many components to the support offered to families dealing with cancer.  My part in this is simple, make meals for families and deliver. That’s it.  And honestly, it is pretty much my comfort level.  Two wonderful coordinators schedule the dinners with the cooking group and let us know of allergies and what not.  The challenge is to have a full meal at the designated family’s house at 5PM.  Usually, I’m just leaving work at 5.  Our family eats late-ish and usually we either do a soup or a main plus one side.  In the summer, a few extra fruits and veggies get tossed in for good health, but we keep it simple.  When cooking for another family, I try to do a main, a side or two, a salad, and dessert.  All to their house at the same time I usually arrive home.  Yeah, stressful.

But words cannot even convey the enjoyment I get out of planning, shopping, cooking and delivering these meals.  Planning is essential!  Meals tend to be delivered a day or two after chemo.  But really, exactly who will be home, who will be rushed to the hospital, and which family members may be visiting is all a guess.  The meal should be hot and ready to eat, hoping the family is having a good day, but should be ready to be stashed in the fridge and freezer if cancer is dictating the family’s schedule.

But it is dessert, always the dessert that gets me.  Desserts just scare me.  There, I said it.  First step towards redemption, right?  See, if a main or side dish gets off kilter, I can conjure up a few tricks and get everything back on track.  But desserts?  Eek!  Lumpy cheese cake?  Done that.  Flat any kind of cake?  Done that?  Crunchy chocolate sauce?  Yup, done that too.  Always one to give it another go, even while muttering under my breathe, I gave this a try.  Oh, and yes, to share with a family dealing with cancer.  Luckily, it was a home run as evidenced by what remained after one day of noshing by a teenager.

Recipe from Baked: New Frontiers in Baking via Epicurious

Ingredients:

Lemon cake

1 1/2 cups cake flour

1 1/2 cups all purpose flour

2 tsp baking powder

1/4 tsp baking soda

1 tsp salt

2 1/4 cups sugar

8 large eggs, room temperature

1/4 cup grated lemon zest

1/4 cup fresh lemon juice

2 cups unsalted butter, melted and cooled

1/4 cup sour cream, room temperature

2 tsp vanilla extract

Lemon syrup

1/3 cup fresh lemon juice

1/3 cup sugar

Directions:

1.  Preheat the oven to 350 degrees.  Spray the sides and bottom of two 9 by 5 inch loaf pans with cooking spray.  Line the bottom with parchment paper and spray the paper.

2.  Sift both flours, baking powder, baking soda, and salt together in a medium bowl.

3.  Put the sugar, eggs, lemon zest, and lemon juice in a food processor and pulse until combined.  With the motor running, drizle the butter in through the feed tube.  Add the sour cream and vanilla and pulse until combined.  Transfer the mixture to a large bowl.

4.  Sprinkle the flour mixture, one third at a time, folding gently after each addition until just combined.

5.  Divide the batter evenly between the prepared pans.  Bake in the center of the oven for 20 minutes, rotate the pans, reduce the oven temperature to 325 degrees and bake for another 30 to 35 minutes, or until a toothpick inserted in the center of the loaf comes out clean.  Let cool in the pans for 15 minutes.

6.  To make the lemon syrup, heat the lemon juice and sugar until the sugar is completely dissolved.  Once dissolved, continue to cook for 3 more minutes.  Remove from the heat and set aside.

7.  Line a half sheet pan with parchment paper and invert the cooled loaves onto the pan.  Use a toothpick to poke holes in the tops and sides of the loaves.  Brush the tops and sides of the loaves with the lemon syrup.  Let the syrup soak into the cake and brush again.  Let the cakes sit for at least 30 minutes.

Notes:

  • Those ingredients in the food processor barely fit.  Be ready to a bit of mess when transferring the liquids to the large bowl.
  • I left the cakes in the pans when poking them with toothpicks to pour in the syrup just to save a bit of time.
  • Yes, you did read the egg and butter quantities correctly.
  • Since this makes two cakes, you can wrap and freeze one for later, or give it to a friend.

Deep Fried Oreo Cookies

Warning!  There is absolutely nothing locally grown nor healthy in this recipe.  None.  At all.

The sun is shining, everyone is getting back outside, and summer is on our minds.  With summer comes county fairs, and with county fairs comes deep fried everything.  In honor of mass produced food-like products that are deep fried and offered to you on a stick, I bring you deep fried Oreos.

This recipe comes from one of the best browsing cookbooks ever, America’s Best BBQ, on the pages featuring Righteous Urban Barbecue in New York, New York.  The book features dishes from some of our country’s best BBQ joints.  Each page is loaded with color pictures, usually highlighting amazing and well seasoned BBQ pits, restaurants looking more like shacks than anything corporate America would ever go for, lots and lots and lots of amazing pork, and rank amateur photos of gut busting food.  True Americana.

Ingredients:

2 cups white cake mix

2 large eggs

1 1/2 cups milk

1 TBS oil

Canola oil for frying

1 package Oreo cookies

Powdered sugar for garnish

Directions:

1.  Preheat the oil in a deep-fryer or deep skillet to 375 degrees.

2.  In a medium bowl, blend the cake mix, eggs, mild, and oil until it forms a smooth batter.

3.  Dip the cookies in the batter until totally coated and them place in the hot oil.  The cookies will gloat.  Fry the cokies until the bottom sides are brown.  Keep a close watch because it takes only a short time to brown them.  Turn the cookies over and brown the other side.  Remove the cookies, drain on a paper towel-lined plate, sprinkle with powdered sugar and serve warm.

Notes:

  • Taste?  Come on now, they are Deep Fried Oreos in cake batter!
  • Personally, I’m not an Oreo fan, but the warm filling and the fried cake batter coating was noteworthy.
  • Yes, more deep fried Oreos were consumed than we care to admit.

Cream Puff Heaven

You may just happen to notice that Livin Local doesn’t sport many dessert recipes, and even fewer baked goods at that.  I’d like to say that is due to the fact there is no local flour milled in this neck of the woods.  But in truth, I just don’t have any baking mojo.  None.

Today our Gourmet Dinner Club is gathering to share a German feast together, and dessert is my assignment.  Give us any other assignment and we can browse and assess recipes like pros, but not desserts.  In testing recipes, we made a peach ditty that was ok, but not special,  and passed it off to our 20 something son with his 20 something friends with their 20 something appetites for their fridge.  A cookie type creation with almond dough wrapping fruit preserves was nibbled at and it sat on the counter in a house with two teenagers before we finally threw it away.  The German chocolate cake, soaked in alcohol, with butter-cream frosting between layers and whipped cream frosting on top, and chocolate shavings all over was so pathetic that we tossed three quarters of it in the garbage because even with all that potential goodness, the cake simply failed.  And none of this surprised me at all.

The cream puffs surprised me.  They are perfect!  On the first try, these lovely pastry shells came out perfectly and we devoured them on the spot.  So, regardless if you are a skilled baker, or if like me, you’ve never found your baking mojo, this is for you.

Recipe from JoyofBaking.com     Makes 18 heavenly cream puffs.

Ingredients:

Pastry:

1/2 cup all purpose flour

1/2 tsp granulated sugar

1/4 tsp salt

4 TBS unsalted butter

1/2 cup water

2 large eggs, slightly beaten

Egg wash glaze:

1 large egg

pinch of salt

Whipped cream:

1 cup heavy whipping cream

1/2 tsp pure vanilla extract

1 TBS granulated sugar

Garnish:

powdered sugar

Directions:

1.  Preheat oven to 400 degrees and place rack in the center of the oven.  Line a baking sheet with parchment paper.

2.  In a bowl, sift together the flour, sugar, and salt.  Set aside.

3.  Place butter and water in a heavy saucepan over medium heat and bring to a boil.  Remove from heat and, with a wooden spoon or spatula, quickly add the flour mixture.  Return to heat and stir constantly until the dough comes away from the sides of the pan and forms a thick smooth ball (about one minute).

4.  Transfer the dough to an electric mixer and beat on low speed a minute or two to release the steam from the dough.  Once the dough is lukewarm, start adding the lightly beaten eggs and continue to mix until you have a smooth thick paste.

5.  Spoon or pipe 12 to 18 mounds of dough onto the baking sheet, spacing them a couple of inches apart.

6.  Beat together the egg and salt for the glaze.  With a pastry brush, gently brush the glaze on the tops of the dough.

7.  Bake for 15 minutes and then reduce the oven temperature to 350 degrees.  Bake for another 30 to 40 minutes or until the shells are a nice amber color.

8.  Turn the oven off and, with the door slightly ajar, let the shells dry out for a further 10 to 15 minutes.  Remove from oven and let cool on a wire rack.

9.  Make whipped cream by placing the whipping cream, vanilla and sugar in a mixing bowl, cooling it in the refrigerator for 30 minutes, and whisking or mixing it until soft peaks form.

10.  To assemble, split the pastry shell in half and fill with whipped cream.  Place the top half of the pastry shell on the shipped cream and dust with powdered sugar.

Notes:

  • Don’t let the number of steps alarm you.  This comes together very quickly. I just write directions out this way because when I read a recipe written in a long paragraph form, I get lost.  Baby steps.
  • Did you notice that most of the ingredients are already in your pantry?  Another reason to give this a try.
  • Seeing how these were devoured at home, I’m making a batch for the adults at the dinner, and another for our teens while they hang out together.

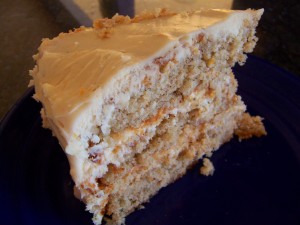
Orange Spice Cake

orange-spice-cake2jpg

Mmmmm, cake! Not normally a cake baker, this has become a welcome addition to my repertoire. Aromatic spices? Check. Local oranges? Check. Makes the house smell autumnal? Check. Gotta love this one!

Spice Cake

Ingredients:

  • 2 cups all purpose flour
  • 1 teaspoon baking soda
  • 1 teaspoon baking powder
  • 1 teaspoon ground ginger
  • 1 teaspoon ground cardamom
  • 1 teaspoon ground cinnamon
  • 1 teaspoon ground nutmeg
  • 1/2 teaspoon salt
  • 2 cups sugar
  • 1 cup (2 sticks) unsalted butter, room temperature
  • 1 tablespoon grated orange peel
  • 4 large eggs
  • 1 cup sour cream
  • 1/2 cup whole milk

Directons:

1. Preheat oven to 350°F. Butter three 9-inch-diameter cake pans. Line bottom of pans with waxed paper. Butter and flour pans; tap out excess flour.

2. Sift first 8 ingredients into medium bowl.

3, Using electric mixer, beat sugar, butter and orange peel in large bowl until fluffy. Beat in eggs 1 at a time.

4. Stir flour mixture into butter mixture alternately with sour cream and milk. Divide batter among prepared pans.

5. Bake cakes until tester inserted into center comes out clean, about 25 minutes. Transfer pans to racks and cool 10 minutes. Turn cakes out onto racks and cool completely. (Can be made 1 day ahead. Store airtight at room temperature.)

Frosting

Ingredients:

  • 2 8-ounce packages chilled cream cheese
  • 8 tablespoons unsalted butter, room temperature
  • 2 cups powdered sugar
  • 2 teaspoons grated orange peel
  • 1 teaspoon vanilla extract
  • 1/3 cup chilled sour cream

Directions:

Using electric mixer, beat cream cheese and butter in large bowl until well blended. Beat in sugar, then orange peel and vanilla. Beat in sour cream. Cover and refrigerate until frosting is firm enough to spread, about 30 minutes.

To Assemble:

Place 1 cake layer on platter. Spread 2/3 cup frosting over. Top with second cake layer. Spread 2/3 cup frosting over. Top with third cake layer. Cover top and sides of cake with remaining frosting.

Notes:

* Do get a fresh orange and use a microplane grater for the peel. The scent is just amazing!

* If you are not familiar with cardamom, you may want to cut it in half for the first go round with this recipe. It is a strong flavor, but oh, so savory!

* In my oven, I can’t get all 3 pans to sit evenly on the same rack. Knowing that opening and closing the oven to swap around pans brings its own problems, I usually just do 2 pans. Of course that leads to some extra frosting, which I just load up between the two layers.

* Made this once with low fat cream cheese. Not a good idea at all as it just didn’t hold up well. Go for the gusto with this one and don’t look back!

Baked Apples

Working with this new book, I thought I’d start off easy before sliding into new territory. Baked apples. I know, why would you even need a recipe for baked apples? But hey, I for one had never before baked these beauties. What changed my mind? Seeing these beauties at Smith Family Farm, shining in their own glory, with naught a drop of wax to deter my sight from their natural beauty. Ahhhhhhhhhh. Oh, and the sugar, and of course the brandy.

Here we go:

  • Heat oven to 375 degrees.
  • Core apples and hollow out with a melon baller or mini scoop.
  • Fill with brown sugar.
  • Douse with brandy.
  • Replace core.
  • Bake for 50 to 60 minutes.

And tah, dah … with such a simple recipe we should all see perfection.  Uh, but on my first try, all I got was 33%.